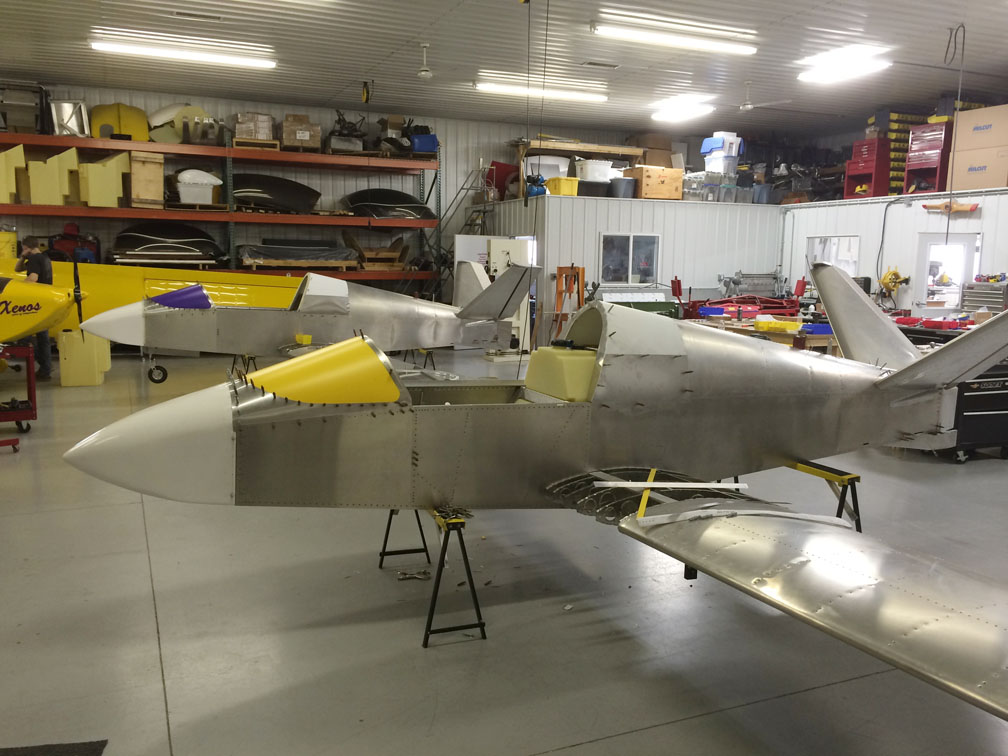
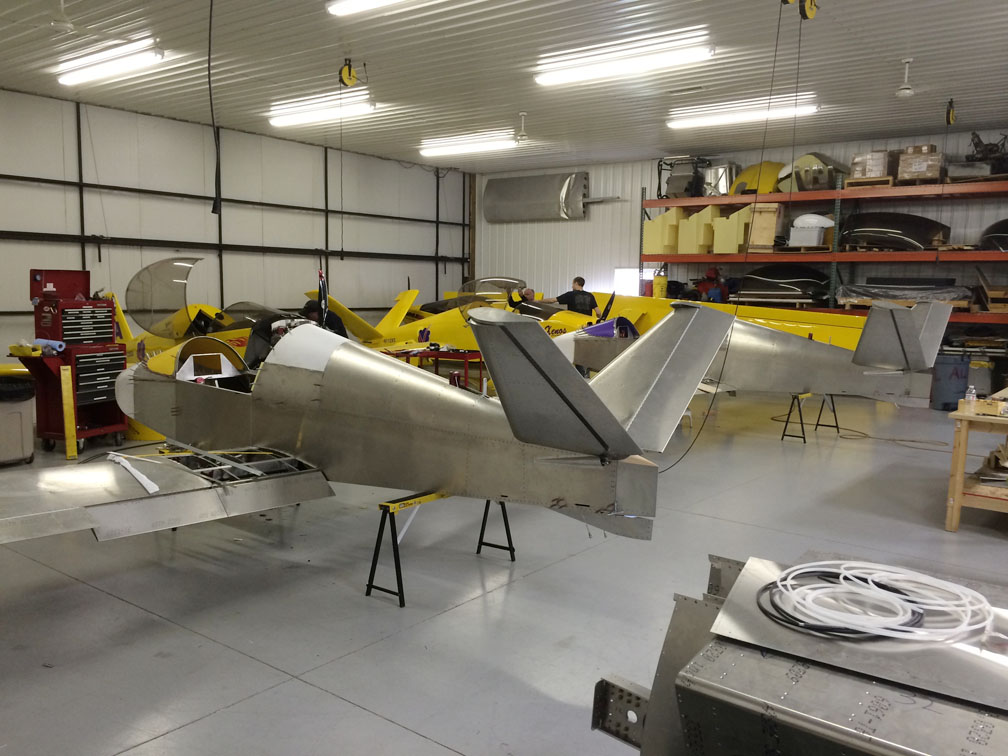
Ever hear the old homebuilt aircraft adage, "The last 10 percent takes 90 percent of the time?" Well it’s fair to say that the Hornets’ Nest team is working on the last 10 or 15 percent of the last 10 percent as the SubSonex Personal Jet JSX-2 prototypes rapidly approach completion in preparation to begin flight testing in June!
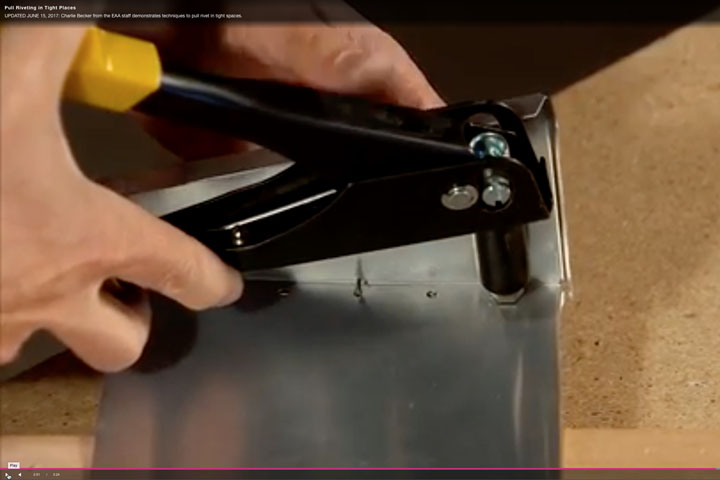
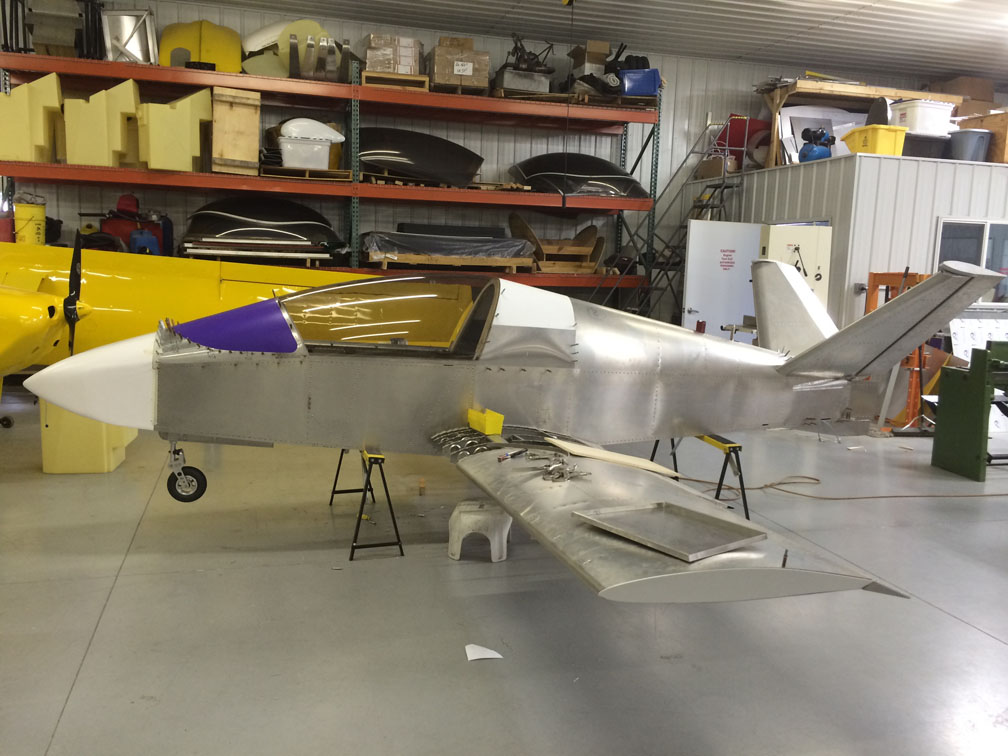
It’s difficult to see a lot of what is currently going-on visually, but the first thing you’ll notice since our last published update, is that there are a lot more rivets where clecos used to be. That’s significant because it means that all of the details underneath the skins have been completed:
 Click to Enlarge
From this angle you can see the instrument panels being mocked-up as we prepare for avionics installation:
 Click to Enlarge
One of the current major activities is finalizing design of the canopy frame and latch mechanism. You can see a canopy being test-fit on one of the aircraft here:
 Click to Enlarge
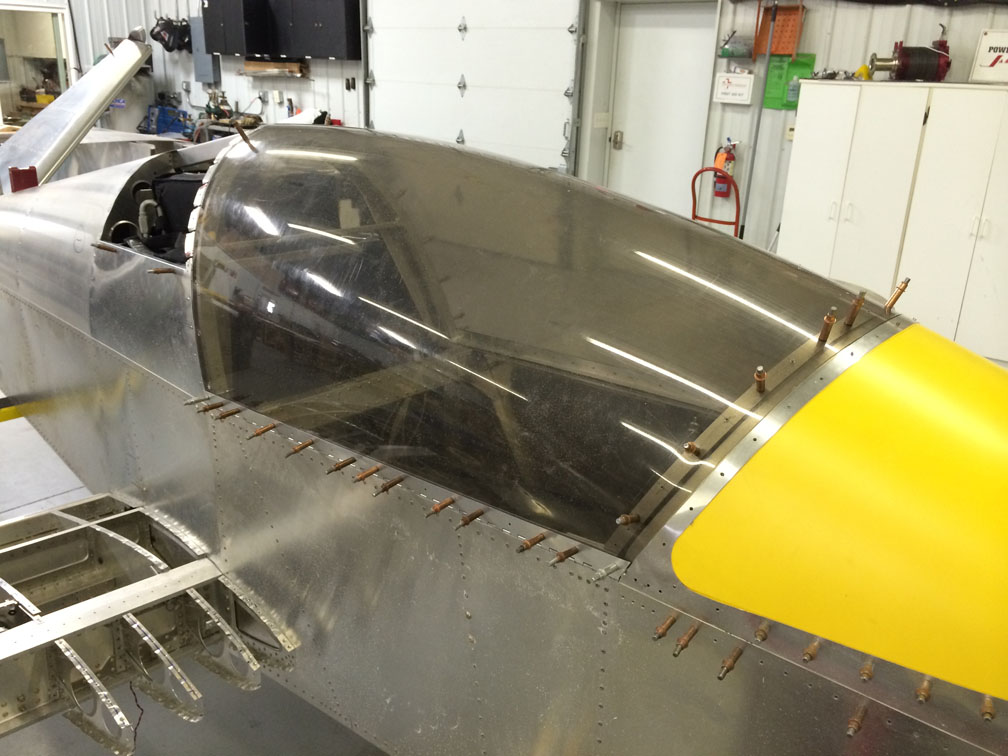 Click to Enlarge
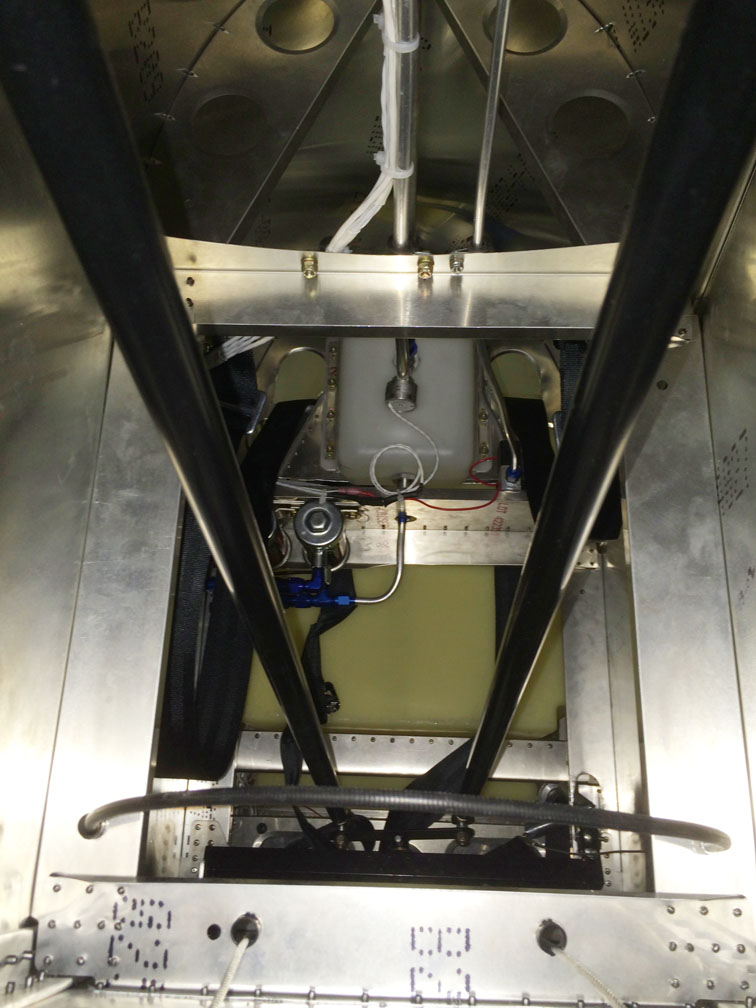
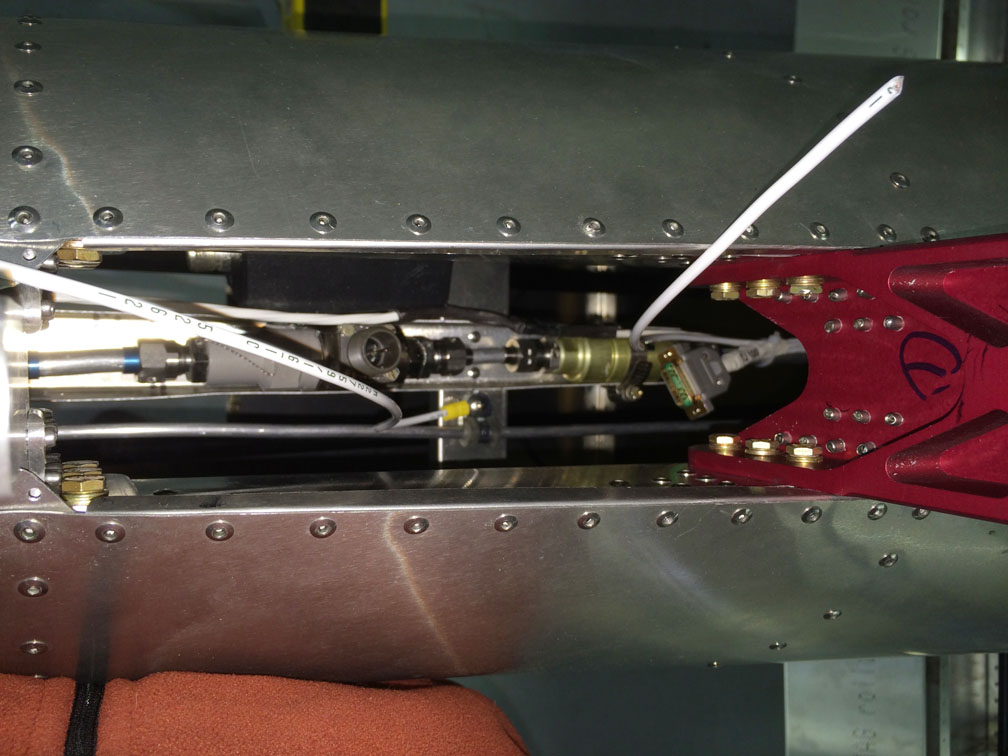
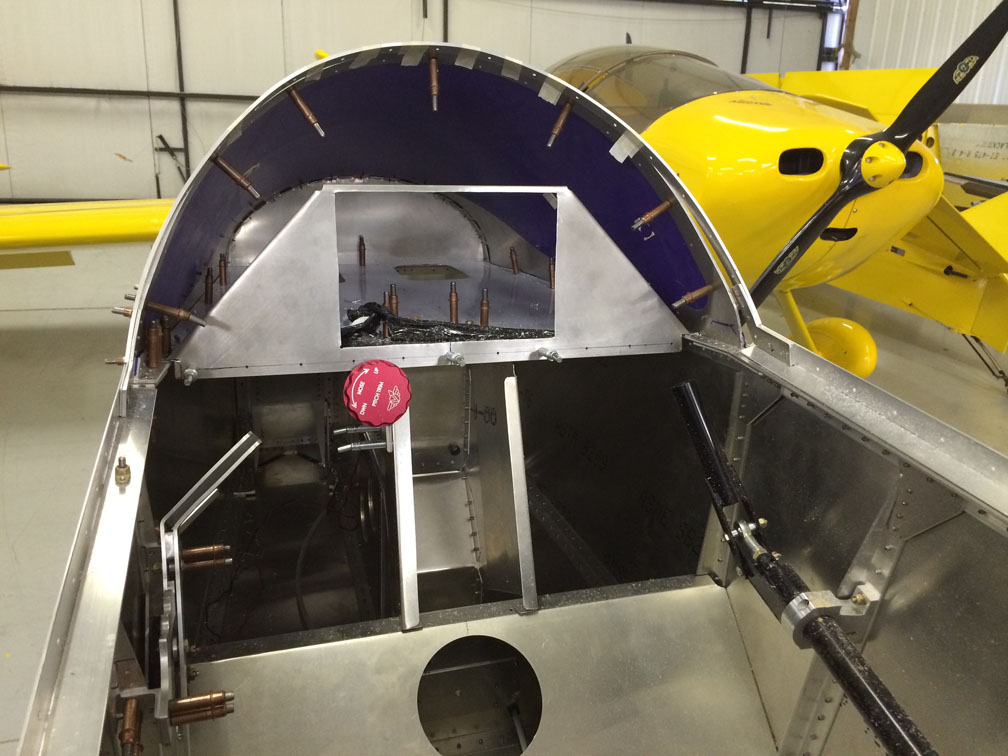
As mentioned before, seeing more rivets and fewer clecos means that structures like the tail cone are buttoned-up with all of the systems underneath installed. Here is a view from the engine mount station’s fuselage floor inspection panel looking forward to the back of the fuel tank. You can see installed flight control components, fuel system plumbing and engine installation wiring:
 Click to Enlarge
Here is a view from the top down into the tail cone at the engine mounts. Fuel system components are plumbed and wiring is installed with multi-pin connectors ready to plug into the engine:
 Click to Enlarge
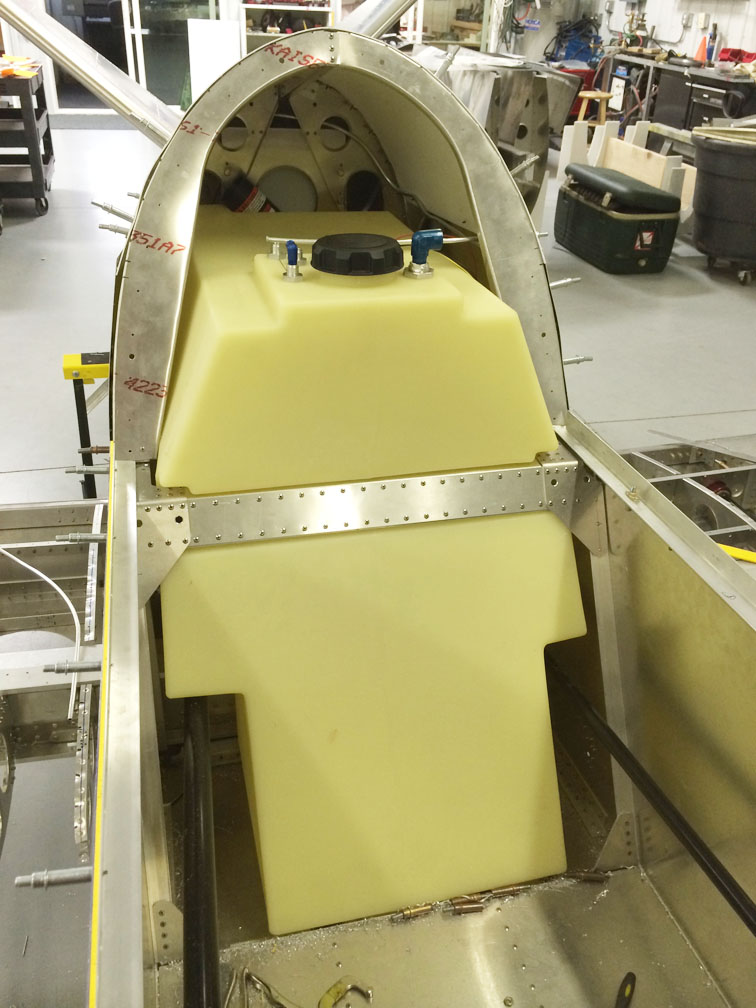
From the front you can see the fuel tank currently in-place with fittings installed. The fuel tanks come in-and-out of the two aircraft on a fairly regular basis at this phase of construction as we verify the fit of all the prototype components. Installing and removing the tank is a super-simple process through the cockpit opening. The bolt-in fuselage cross-tie that can be seen bisecting the tank at the upper longerons is what clamps the tank in-place at the front with a similar cross-tie clamping the back. Remove the forward cross-tie and the tank comes right-out. All plumbing and electronic fuel level probe connections are at the top of the tank, by the filler neck as-seen here:
 Click to Enlarge
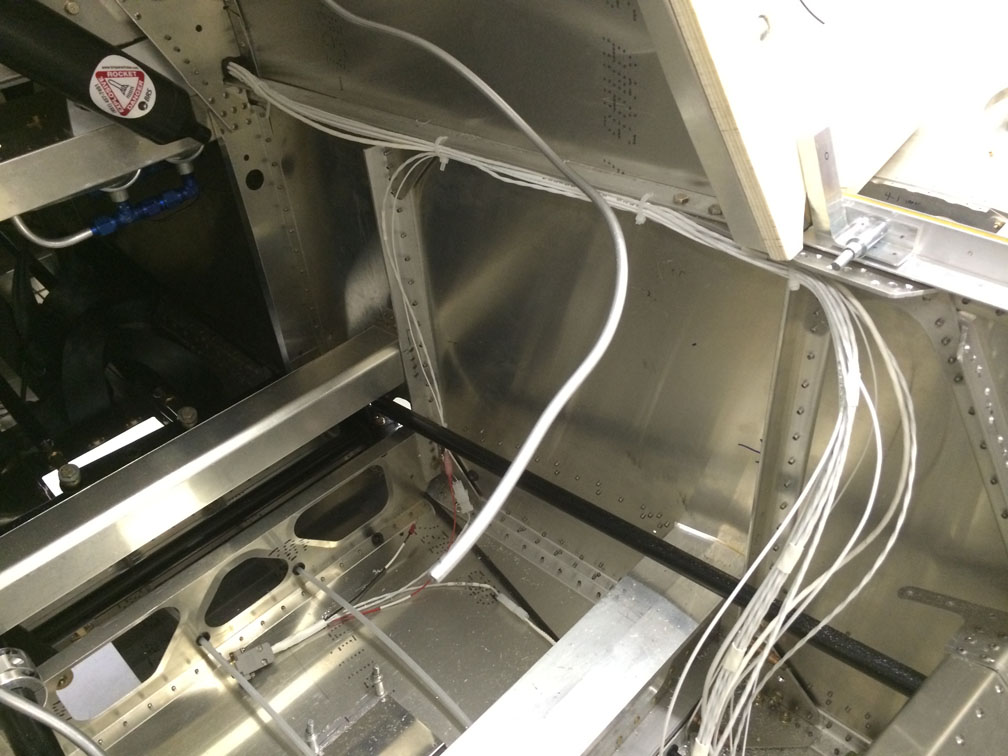
With the tank removed on the other prototype, you can see wiring looms in-place, progressing from the engine and fuel system electrical connections forward to the controls and avionics connections. We’ll have pre-wired harnesses complete and ready for installation included in your kit. Access to major flight control components, fuel system components, BRS rocket and BRS harness attach points is also available with the fuel tank removed:
 Click to Enlarge
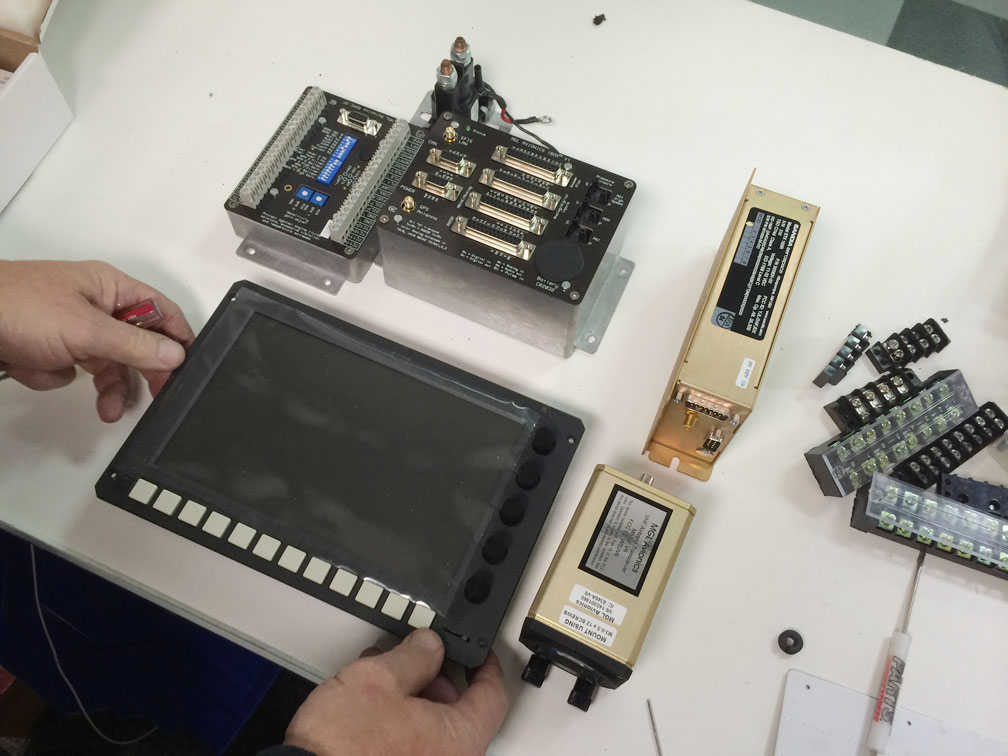
Here is the avionics suite being used in our JSX-2 prototypes: the MGL Stratomaster iEFIS Explorer package with remote-mounted Sandia transponder that will likely be the most-popular choice for SubSonex customers. At the lower-right of the picture, you can see the MGL V6 Com radio, which can be controlled by the main touch screen iEFIS instrument. Also available as an option is a remote-mounted radio controlled only by the iEFIS with no radio “head unit” in your panel:
 Click to Enlarge
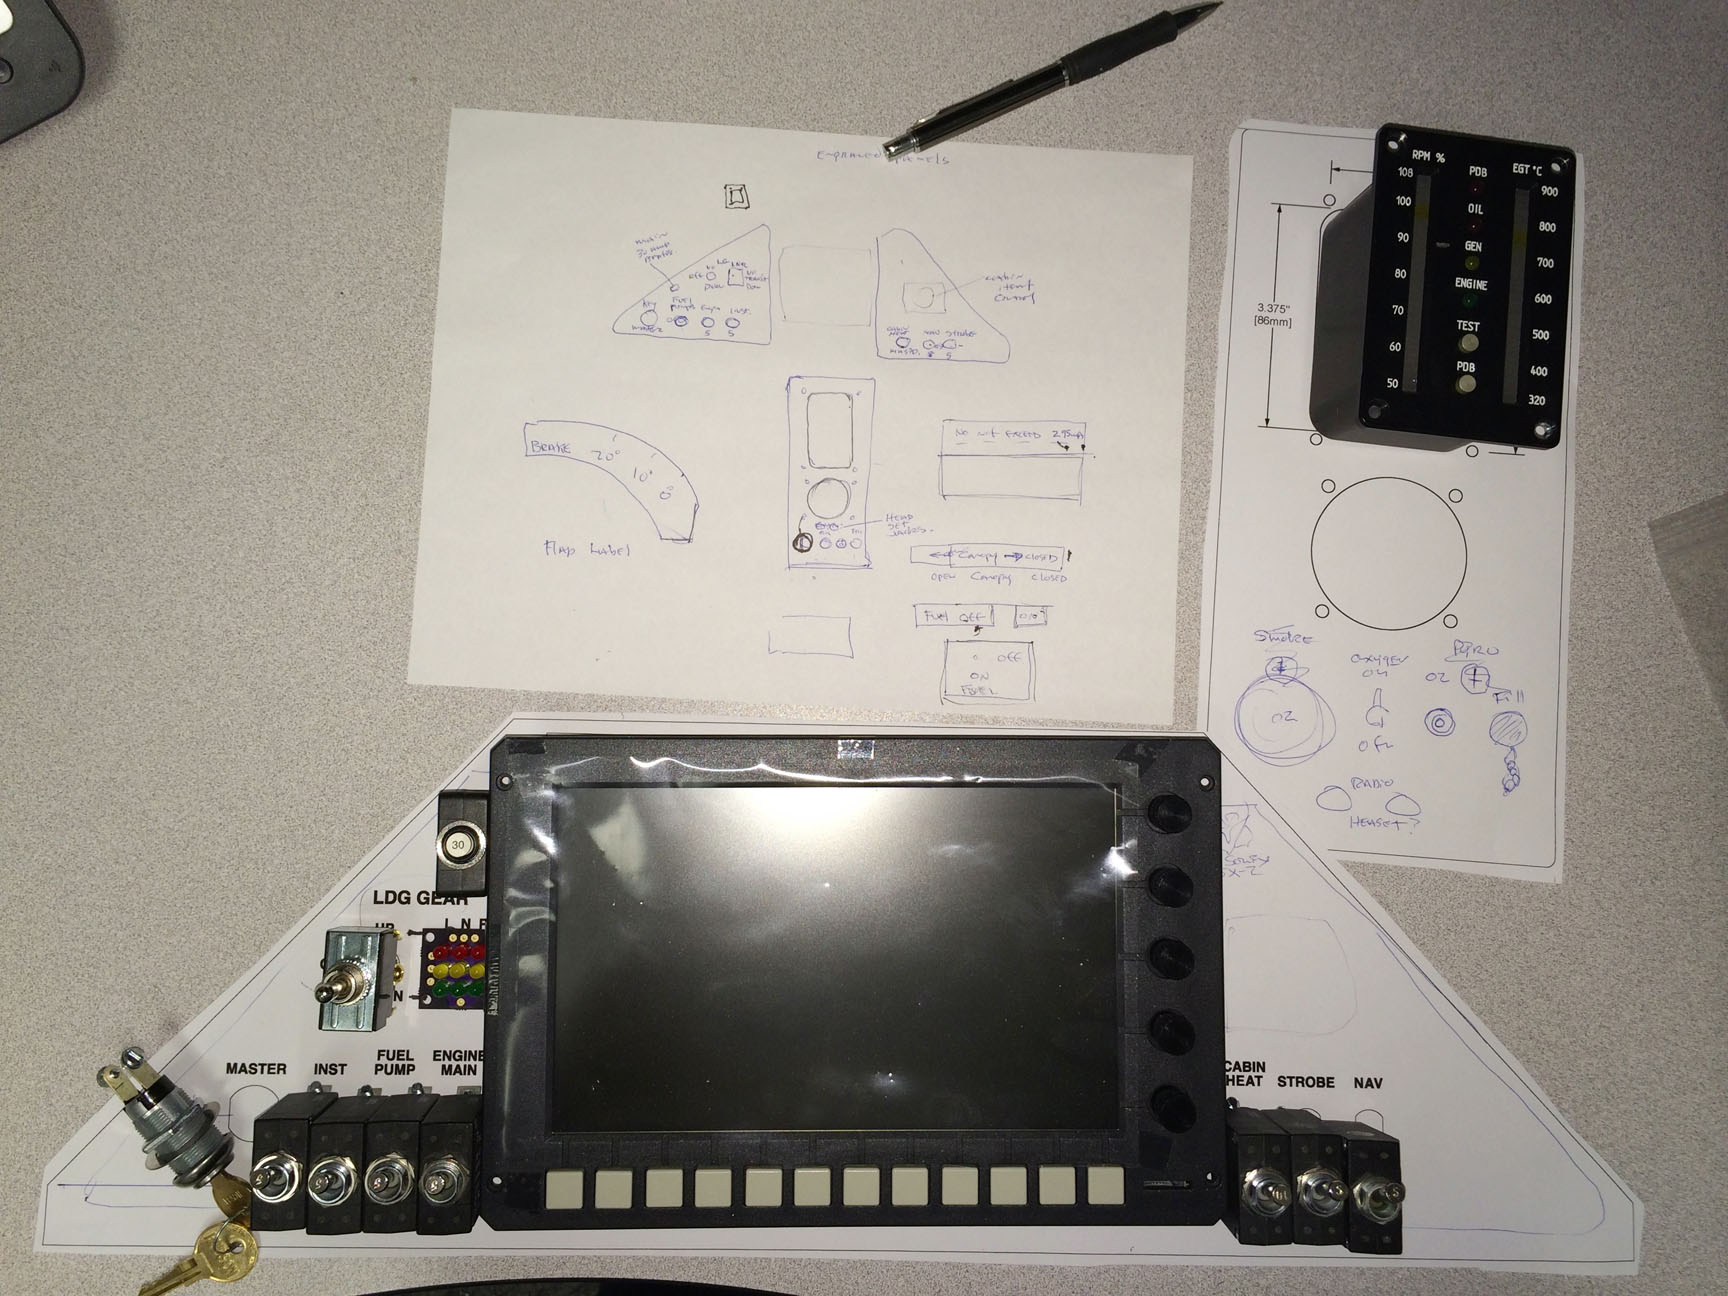
The basic shape and layout of the instrument panel, sub-panel and controls will be very similar to that shown in the cockpit mockup at AirVenture 2013:
 Click to Enlarge
Final details of panel layout and cockpit placarding are being determined this week so that an etched panel overlay can be produced for an excellent “finished” look. Panel controls will include master switches, fuel pump switches, landing gear controls, lighting switches, main iEFIS unit, and cabin heat controls. In the sub-panel will be the PBS engine instrument, MGL V6 Com radio, oxygen system monitoring, controls and remote oxygen fill fitting, headset plugs, etc.:
 Click to Enlarge
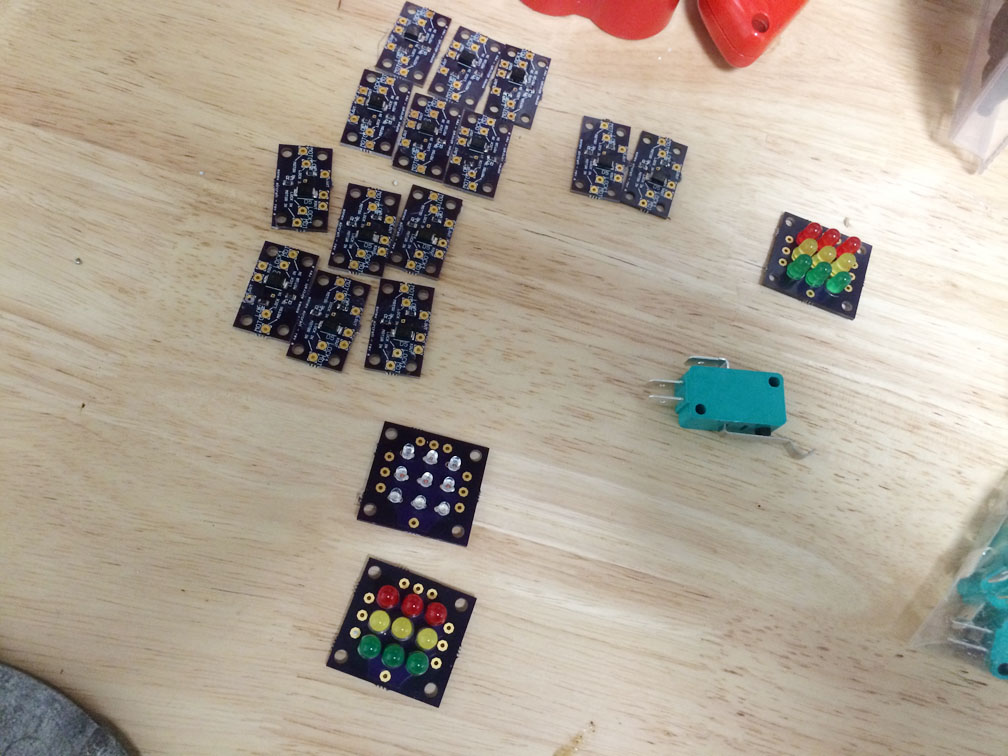
We’re also finishing-up the landing gear limit switch and indicator printed circuit boards and installation wiring design. You can see here the PCB’s, a limit switch, and 3 LED indicator light PCB’s:
 Click to Enlarge
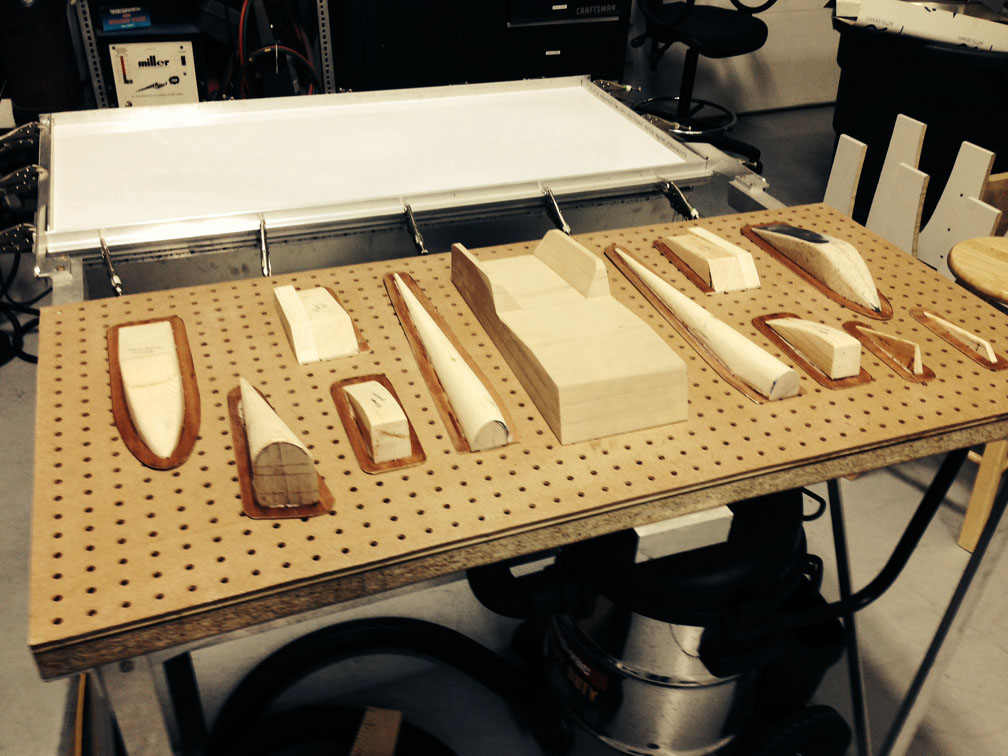
At the tail you can see things like the finished tail strake fairing (will have a solid plastic skid plate attached to the bottom), and the wooden plug being test-fitted for making molded plastic rudder cap fairings. You can also see the layout lines drawn for the rudder cable cutouts in the aft fuselage side skin — work like this allows us to finalize the detailed laser-cut cutouts in the production parts:
 Click to Enlarge
A prototyping project that will eventually benefit the entire line of Sonex Aircraft, vacuum-molded plastic parts are being produced for non-structural fairings and components on the SubSonex, such as the rudder cap fairing, cable and pushrod fairings, aileron counterweight fairings, and oxygen bottle cradle:
 Click to Enlarge
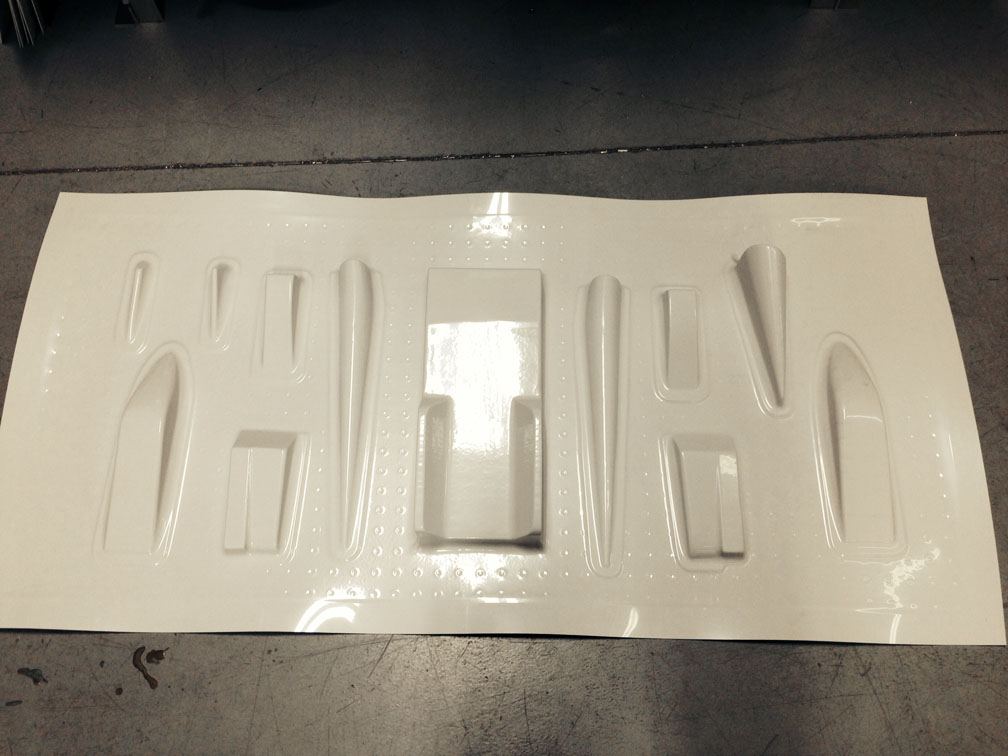 Click to Enlarge
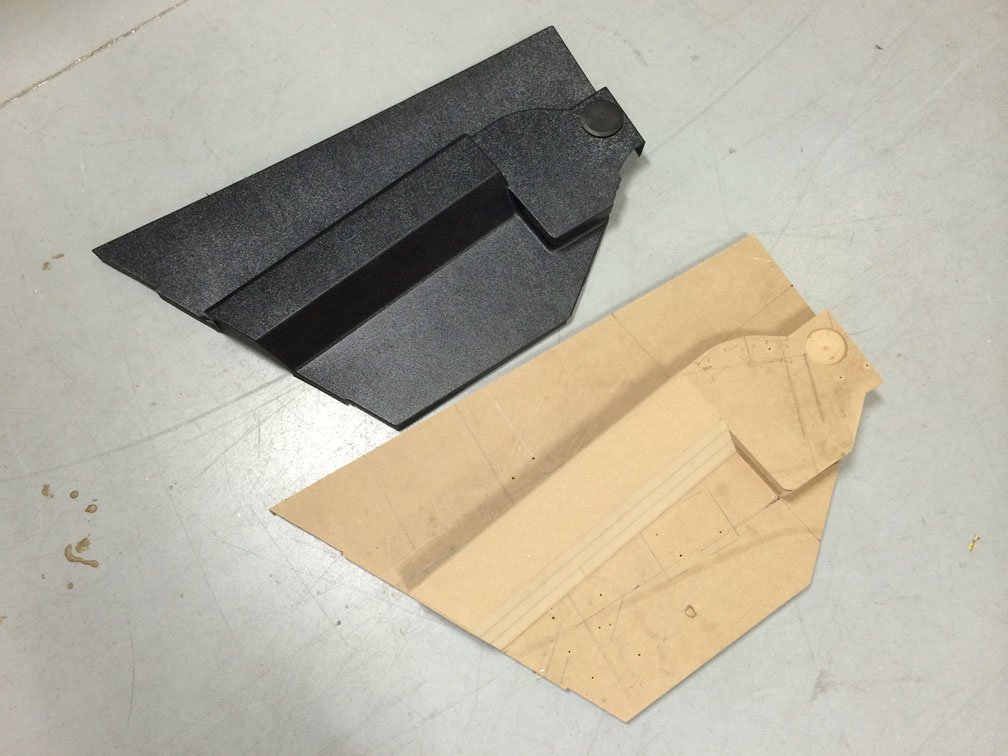
Our new vacuum molding machine will also produce lightweight ABS cockpit trim panels — LH cockpit side wall trim panel shown here:
 Click to Enlarge
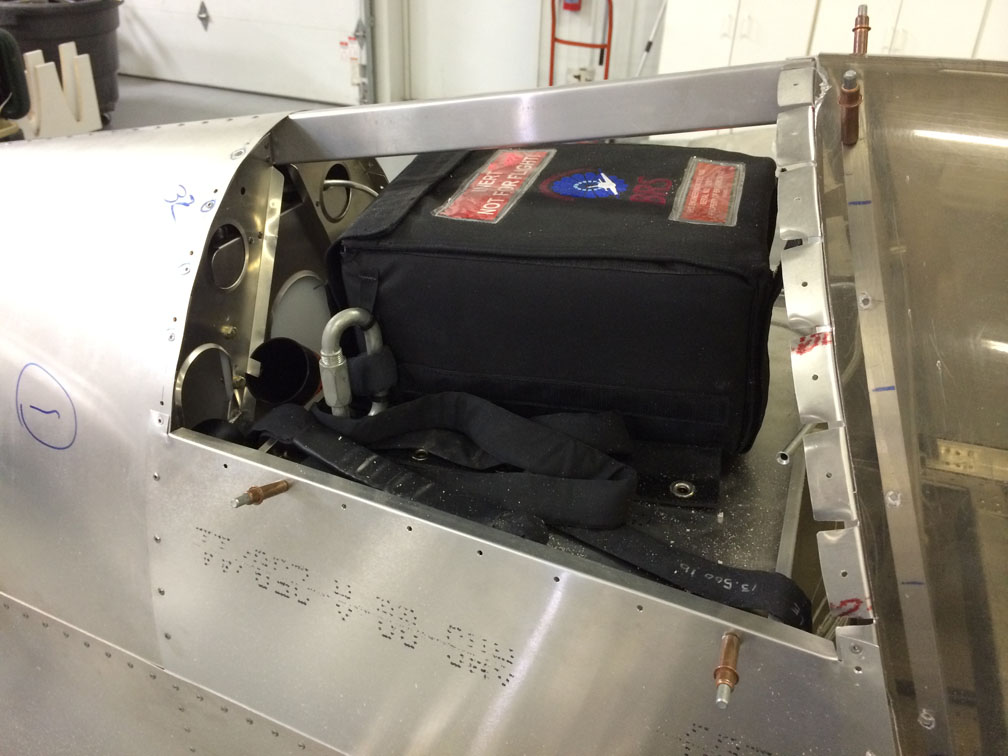
The BRS chute pack "shelf" is also installed as final preparations are being made for installation of the full-aircraft BRS recovery system:
 Click to Enlarge
Production planning for customer SubSonex Quick Build kits is also well underway, as production tooling and fixtures are being constructed, and the first batches of parts are being ordered!
Sonex Aircraft Models
- Sonex Highwing
- Sonex-B
- Waiex-B
- Xenos-B Motorglider
- Onex
- SubSonex Personal Jet
- Sonerai Sport Aircraft